Every case you add gets its own page with hearings, files, notes and fees. Once a case is in, the app reminds you of every hearing date.
1. Tap the + button
The green + in the middle of the bottom bar opens Add Case from any screen. The form has four short steps.
2. Basic Info
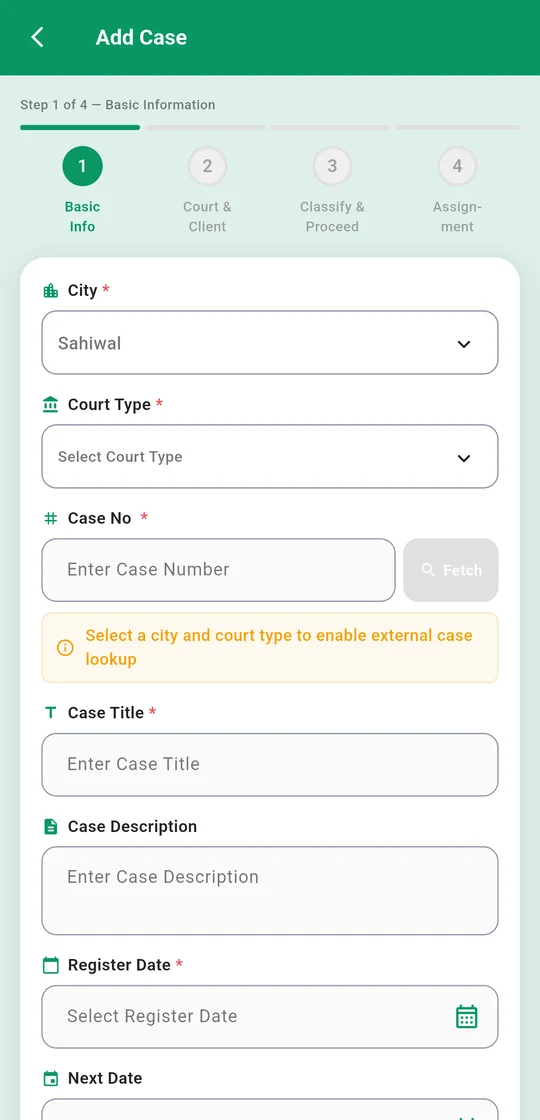
- City and Court Type.
- Case No: for district courts in Punjab, tap Fetch after choosing the city and court type. The app looks the case up on the court's website and fills in what it finds.
- Case Title and an optional Case Description.
- Register Date: the date the case was officially registered. Every case needs one.
- Next Date: the next hearing, if you know it.
3. Court & Client
- Court: the court the case is in. Can't find yours? Add it under Manage → Office setup → Manage Courts.
- Client: pick your client. If they aren't in the list yet, use Quick Add Client to add them without leaving the form. Add their phone number so you can share the case with them later.
- Side: which side your client is on.
4. Classify & Proceed
Choose the case Category and the Stage it's at now. Turn on Action Required if the next hearing needs a short order or follow-up notes. It shows two more fields.
5. Assignment
Choose who in your chamber is responsible for the case, and save. The case now shows on your home screen and in your calendar on its hearing date.
Changed your mind? Press back and the app asks before throwing away what you typed. Find a case later: tap Cases in the bottom bar and search by title, case number or category.